Do you use Gmail? If you do, you may be like many others and have pages and pages of emails in your Inbox. This isn’t great for alleviating the feeling of overwhelm every time you check your mail! Here are a few ideas of how to easily organise your Gmail Inbox.
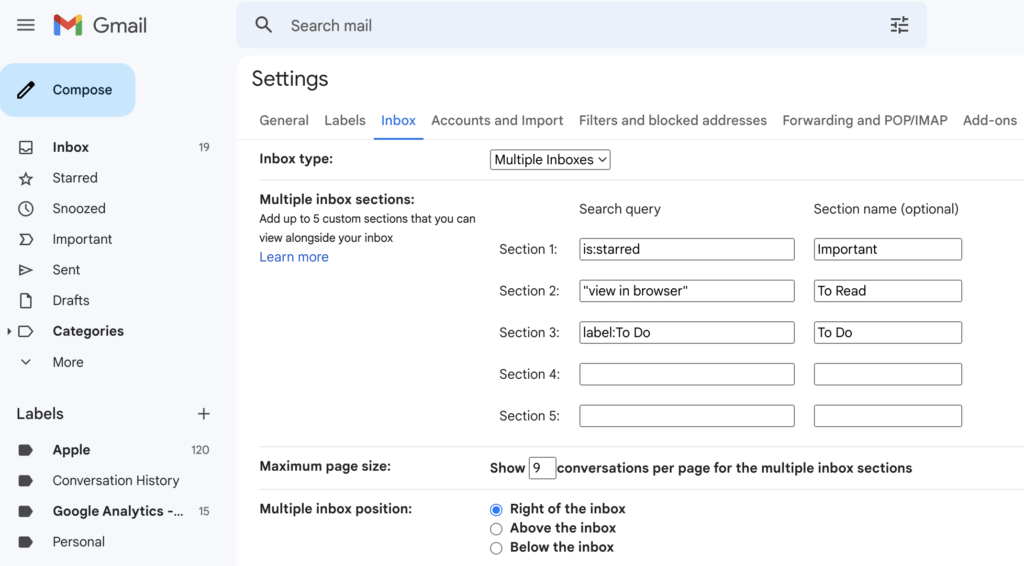
Multiple Inboxes
📥 Use the Multiple Inbox option to give you up to 5 bespoke inboxes. I would recommend the following Inboxes to start with:
To Do – for emails that you can’t respond to straightaway – by putting the “To Do” label on the message, you’re telling GMail that you want it visible in this Inbox rather than the main one.
Important – messages that you’ve either manually starred or, have used a filter to update
To Read – this could be for newsletters that you’ll want to look at during quiet times – by searching for the words “view in browser” you should be able to divert anything from a mailing list to this inbox
This option is available in the Settings menu
Setup your filters
🗂 Use Filters to automatically label emails. In Google you have comprehensive settings available for how you want to label your emails. This can be done as they arrive by setting the software to watch for senders (individual senders or whole domains) or specific words in the subject line or email body to allocate labels. Labels in Gmail function in a similar way to folders in other applications such as Outlook but, they can do so much more (for example, a single email can be allocated multiple labels, if it suits your filing system).
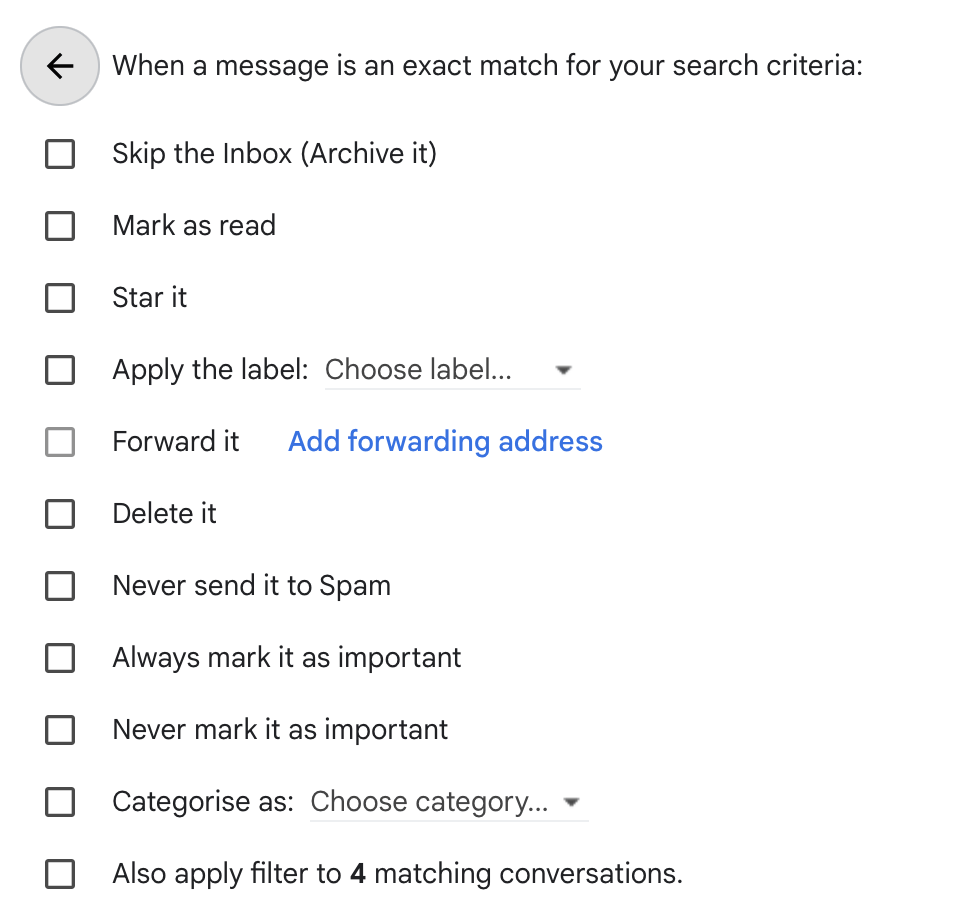
Once you setup the filter, it is possible to give the labels to emails already in your inbox by checking the last item in the checklist.
Archive what you don’t need
🗑 Archive emails you don’t need to have sitting in your Inbox. You can archive the messages automatically via the filters described above or, you can manually select messages and carry out a bulk update.
If you select the “Skip Inbox” option in the filter settings, the message will go straight to the label without even touching the Inbox.
There is no need to fear archiving messages. You are not deleting the messages, instead you are just moving from the actual Inbox. If you have labelled them, you’ll still be able to the archived messages in the “folder”. Also, when you run a search, it will include these messages too (even ones without labels).
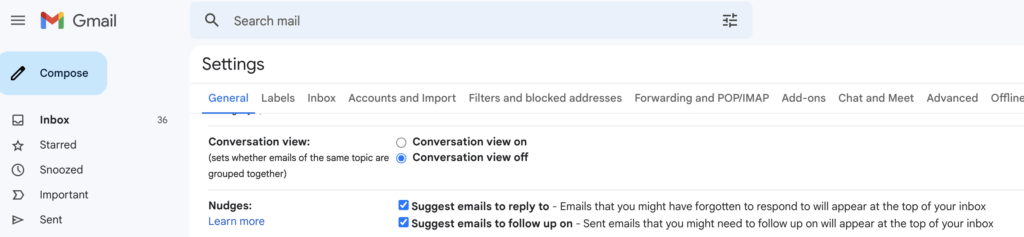
Get Nudged
👆🏻 Activate the Nudges feature. This uses Gmail algorithms to remind you to respond to emails which you may have overlooked. When you have this feature activated you can help to eliminate the chance of losing important emails in the depths of your inbox.
Once you have control of your Inbox, you may want to turn this feature off but, it’s a really good option to use at the start of this clear-up process.
I really hope that this article has given you a few pointers in how to easily organise your Gmail Inbox. If it still feels, like an onerous task, you could always hire a virtual assistant to set it up for you!